Step-by-Step Guidelines for Authorization Manager
1. Go to Start Menu > Type “AzMan.MSC”
2. Right click the Red Cross > click “Open Authorization Store”
3. Point to the %SystemRoot%ProgramDataMicrosoftWindowsHyper-VInitialStore.XML > click Ok.
4. When you click Ok, the Authorization Manager will read the InitialStore.XML and load the contents from the file to be displayed in the snap-in as shown below:
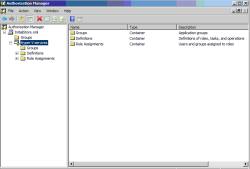 |
| Figure 3 Authorization Manager Snap-in |
Three major categories are defined in the Authorization Manager to control Hyper-V Server and VMs. These categories are:
- Hyper-V Services Operations
- Hyper-V Network Operations
- Hyper-V Virtual Machine Operations
As stated earlier, there are 33 operations. These operations are divided into above categories. The below table shows the Operations included with these categories:
 |
| Figure 4 Hyper-V Operations Categories in Authorization Manager |
As shown in Figure 1.4, using Authorization Manager, you can delegate two types of operations for Hyper-V and VMs Configuration. These operations are: Modify or Read. These delegations are required in a large organization where one team is responsible for modifying the Hyper-V Configuration and one team is responsible for monitoring the Hyper-V VMs and other things. These are the available Operations included in Authorization Manager. You cannot get anything above 33.
The Administrator Role is the only role defined in Authorization Manager that includes all 33 operations by default. This role is complete enough to control all the aspects of Hyper-V including VMs and its configuration.
A simple example would be allowing a user other than the Local Administrator to manage Hyper-V Server and VMs.
By default, Local Administrator on Hyper-V server is allowed to control the Hyper-V Server and all the VMs running on it. You can delegate this control to a user who is member of an Active Directory Domain. This is a simple example to grant someone in your organization to control Hyper-V Server and VMs rather than using the Local Administrator account on the Hyper-V Server. You will use Local Store of Authorization Manager for this example.
- Open AzMan.MSC
- Right Click on “Open Authorization Store” > select the XML File from this location: ProgramDataMicrosoftWindowsHyper-VInitialStore.XML.
- Click OK to open the InitialStore.XML Policy settings in Authorization Manager.
- Expand Microsoft Hyper-V Services > Role Assignments.
- In Right Pane, right click on “Administrator” select “Assign Users and Groups” and then select “From Windows and Active Directory”.
- Enter the name of User or Security Group you want to allow them to control the Hyper-V and VMs.
- Click OK and then close the Authorization Manager snap-in.
That’s it. The above examples enable a user in Active Directory Domain to control the Hyper-V Server and VMs running on it.
The next article in this series will explain the more granular control over Hyper-V and VMs running on it.
Conclusion
This article explained Authorization Model to provide security for VMs running on Hyper-V Server. We also explored the Tasks available with Authorization Manager. We also provided a simple example on how to configure a different user other than Administrator to control Hyper-V Server and virtual machines.